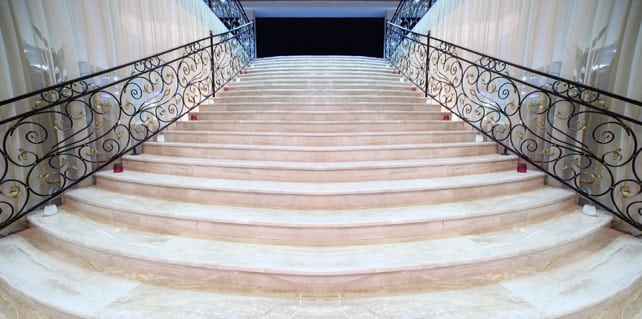
Measuring stairs for tiles can be a daunting task. However by means of this short article, it is hoped you will feel confident enough to measure up your own stairs.

The first thing you must do is get the data you need.

Below is the information you need:

Tile Size:                                 x                                  (tile size in meters)

Width of stairs:                                                          (width in mm)

Depth of Stairs:                                                          (depth in mm)

Height of Riser:                                                          (height in mm)

Size of Landing:                      x                                  (need both width and depth)

Number of Stairs:                                                      (count all that need an edge tile)


Now let’s explain each measurement and how to work it out.

Tile Size: It’s important to decide on which tile size you want to lay on your stairs. Most people go for the same size as the tiles laid on the main floor leading up to the stairs. That way you can just order more and ensure the tiles used are from the same batch creating a more uniform finish. Then take the tile to a marble or porcelain polisher and they will round the edge. They will also give you the option of having three or four grooves along each step to provide extra traction.

Example: If you had a 600x600mm tile on the main floor you would no doubt choose the same tile. Please write this down as .6x.6 which is its size in meters.

Width of Stairs: This is simply a matter of measuring across the stair. You must then think where you want the grout joint. The two most used options are to join the tiles in the middle, or to have a middle
tile (so that you don’t have porous grout joints where you will likely walk) and two cut tiles either side. Make sure whichever option you choose that you only have cut edges against the wall or edge. This is because 1) They are sharp and can cut bare feet, and 2) because they are never as straight as a factory cut edge.

Example: If you had a measurement width of anything from 910mm to 1200mm (normal widths) then you will use two 600x600mm tiles wide. Any off cuts will be wasted but it won’t add too much extra expense.

Depth of Step: This is done by measuring from the front edge of the step to the back edge of the step. Most of the time this ranges between 200 and 400mm. Write this measurement down. Make sure that the tile length is longer than your stairs depth. This is important if you don’t want an extra grout joint (and who of us would want extra grout on a stair case). Then move to the next step.

Example: If the stair is 250mm deep then a 600mm tile is fine. The offcut of 350mm should be used on the riser. See the next step.

Height of riser: This is easy. Just measure how high the steps are. In Australia, most risers are between 150-190mm. Now add the height of the riser to the depth of the step. If it’s less than your tile length that’s great as you’ll only need one tile to do both step and riser.

Example: If the step was anywhere from 910 to 1200mm wide (normal) then you would need two 600x600mm tiles per step including the riser.

Size of Landing: Calculate the area of the landing by measuring its width by its depth.Then allow how many tiles you need.

Example: If it was 1100mm W x1100mm D you would need four 600x600mm tiles.

Remember! If the stair case changes direction, care needs to be given to the grout joint lining up in both directions and may require extra tiles.

Number of Stairs: You need to manually count everywhere you need a rounded edge. Normally the first area is the same level as the floor and does not need to be counted. Although the top level is not technically a ‘step’, the tile will still require a rounded edge.

Example: 18 to 22 steps are normal.

Remember! Make sure all the steps are the same size.


Now how to calculate the steps. First work out how many tiles you need per step as shown above, then multiply this by the number of steps and add your landing tiles.

Example

Tile size:                                .6m x .6m (600x600mm)         (tile size in meters)

Width of stairs:                       1100mm                                  (Width in mm)

Depth of stair:                         230mm                                    (Depth in mm)

Height of riser:                        190mm                                    (height in mm)

Size of landing:                       1100mm x 1100mm                (need both width and depth)

Number of stairs:                    18                                            (count all that need an edge tile)


With these measurements, you can calculate that each step will require 2 tiles. Multiply this by the number of steps (18) and it equals 36 tiles.  Add the steps needed for the landing (4) and you have 40 tiles. Add about 2 tiles for cutting mistakes etc. You have 42 tiles.

To work out how many square meters, multiply 42 (tiles) X 0.6 X 0.6 (the size of the tile in meters). This equals 15.12 square meters (referred to as /m2). You need to take 38 tiles for the edging plus the two for spares or mistakes. So take 40 to the tile polishers and rounders.

One thing that many forget is under the stairs. Many have a really good idea of using the void under the steps for storage. If you do, make sure you allow tiles to tile under this area. It makes it look better if you leave the door open and makes it easier to clean.

We hope that this guide on measuring stairs has helped. If not, please measure and fill in the above details or bring in the plans to Tile Factory Outlet’s friendly staff who will estimate it for you. They can also give you a list of marble and porcelain tile rounders polishers and groovers.

Note: The above information applies to traditional staircases. Common in many apartments and townhouses are staircases that have no landing halfway up. Instead, the staircase curves around 180 degrees and rises to the next level.

With these, you need to follow the above guide, making sure that you measure the depth of each tile at its deepest point. Visualise where the grout joints will align. This may require additional tiles.

If you need any clarification regarding measuring stairs, or if you would like further assistance, please contact us here at TFO. We’ll be more than happy to help.

Tile Factory Outlet has a great range of quality tiles for stairs and the rest of your home, at amazingly low prices. Visit us in our Sydney showroom or compare and buy tiles from our online store.